Difficulty: Easy (but math heavy)
Skills Used: following the mouse with delay, random numbers, event handlers, addChild, getting the time
This isn't an especially useful app, but it looks cool. Every time you move the mouse, the parts of the clock follow (with delay). Every part of the clock travels at a different speed, which is randomized every time you move the mouse. And of course, it keeps perfect time.
Instructions:
1. Open a new file in Flash. Make sure you are using Actionscript 3.0. Right click on the grey area around the stage and select "Document Properties" from the menu that pops up. I made my stage 500 x 500 pixels, you can always change this later.
2. In the top menu, select Insert -> New Symbol and name it "12". Select the Text tool from the Tool menu, it looks like the letter T. In the Properties Inspector, set the first two options to "Classic Text" and "Static Text". Then pick the font and font size that you want. Mine is "Herculanum", 35 pt. Click on the stage. Type the number "12". In the Tools window, select the Selection tool, it looks like a black arrow. Click on the "12" you typed. Use the Alignment window to center the 12 right over that little cross in the middle of your screen.
3. Repeat the last step to create movieclips for numbers 1 - 11.
4. In the library, you should now be able to see movieclips 1 - 12. We need to give each movieclip a class name so your Actionscript can read it. Doubleclick to the right of "1", under the word "Linkage". When the cursor pops up, type in "one". It's better to spell out the word, if we only use numbers it will foul up the code later. Now doubleclick to the right of "10" and type in "ten", and so on and so forth until all twelve movieclips have Linkage names.
5. Open up the Actions window and paste in the following code:
var a:Number = 32.5;
var b:Number = 56.3;
var c:Number = 65;
var myTwelve:twelve = new twelve();
addChild(myTwelve);
var random12:Number = (8 + Math.floor(Math.random()*12));//sets the initial speed of the number before the mouse moves
var myOne:one = new one();
addChild(myOne);
var random1:Number = (8 + Math.floor(Math.random()*12));
var myTwo:two = new two();
addChild(myTwo);
var random2:Number = (8 + Math.floor(Math.random()*12));
var myThree:three = new three();
addChild(myThree);
var random3:Number = (8 + Math.floor(Math.random()*12));
var myFour:four = new four();
addChild(myFour);
var random4:Number = (8 + Math.floor(Math.random()*12));
var myFive:five = new five();
addChild(myFive);
var random5:Number = (8 + Math.floor(Math.random()*12));
var mySix:six = new six();
addChild(mySix);
var random6:Number = (8 + Math.floor(Math.random()*12));
var mySeven:seven = new seven();
addChild(mySeven);
var random7:Number = (8 + Math.floor(Math.random()*12));
var myEight:eight = new eight();
addChild(myEight);
var random8:Number = (8 + Math.floor(Math.random()*12));
var myNine:nine = new nine();
addChild(myNine);
var random9:Number = (8 + Math.floor(Math.random()*12));
var myTen:ten = new ten();
addChild(myTen);
var random10:Number = (8 + Math.floor(Math.random()*12));
var myEleven:eleven = new eleven();
addChild(myEleven);
var random11:Number = (8 + Math.floor(Math.random()*12));
addEventListener(Event.ENTER_FRAME,assembleClock);
function assembleClock(event:Event)
{
myTwelve.x += (mouseX - myTwelve.x) / random12;
myTwelve.y += ((mouseY - c) - myTwelve.y) / random12;
myThree.x += ((mouseX + c) - myThree.x) / random3;
myThree.y += (mouseY - myThree.y) / random3;
mySix.x += (mouseX - mySix.x) / random6;
mySix.y += ((mouseY + c) - mySix.y) / random6;
myNine.x += ((mouseX - c) - myNine.x) / random9;
myNine.y += (mouseY - myNine.y) / random9;
myOne.x += ((mouseX + a) - myOne.x) / random1;
myOne.y += ((mouseY - b) - myOne.y) / random1;
myTwo.x += ((mouseX + b) - myTwo.x) / random2;
myTwo.y += ((mouseY - a) - myTwo.y) / random2;
myFour.x += ((mouseX + b) - myFour.x) / random4;
myFour.y += ((mouseY + a) - myFour.y) / random4;
myFive.x += ((mouseX + a) - myFive.x) / random5;
myFive.y += ((mouseY + b) - myFive.y) / random5;
mySeven.x += ((mouseX - a) - mySeven.x) / random7;
mySeven.y += ((mouseY + b) - mySeven.y) / random7;
myEight.x += ((mouseX - b) - myEight.x) / random8;
myEight.y += ((mouseY + a) - myEight.y) / random8;
myTen.x += ((mouseX - b) - myTen.x) / random10;
myTen.y += ((mouseY - a) - myTen.y) / random10;
myEleven.x += ((mouseX - a) - myEleven.x) / random11;
myEleven.y += ((mouseY - b) - myEleven.y) / random11;
}
addEventListener(MouseEvent.MOUSE_MOVE, randomize);
//changes the speed of the numbers everytime the mouse moves
function randomize(event:MouseEvent):void
{
random12 = (8 + Math.floor(Math.random()*13));
random1 = (8 + Math.floor(Math.random()*13));
random2 = (8 + Math.floor(Math.random()*13));
random3 = (8 + Math.floor(Math.random()*13));
random4 = (8 + Math.floor(Math.random()*13));
random5 = (8 + Math.floor(Math.random()*13));
random6 = (8 + Math.floor(Math.random()*13));
random7 = (8 + Math.floor(Math.random()*13));
random8 = (8 + Math.floor(Math.random()*13));
random9 = (8 + Math.floor(Math.random()*13));
random10 = (8 + Math.floor(Math.random()*13));
random11 = (8 + Math.floor(Math.random()*13));
}
The first part of the code adds each movieclip to the stage. An event listener repositions the numbers every time you enter a new frame. The numbers are moved a fraction of the distance it will take to reach the mouse. Because the fraction of the distance gets smaller and smaller, the numbers start out moving quickly and then slow down as they get closer to the mouse. The exact fraction will be a random number between 8 and 20. An event listener resets the speeds for each number every time you move the mouse.
Test your movie. Every time you move the mouse, the numbers should move to their respective spots around it. The numbers should all be moving at different speeds, and those speeds should change everytime you move the mouse.
6. In the top menu, select Insert -> New Symbol, name it "secondHand". Use the line tool to draw a vertical line on the stage. In the Properties Inspector set the X to 0, the Y to -65, and the height to 65. Play with the thickness and color if you like.
7. Insert -> New Symbol, name it "minuteHand". Use the line tool to draw a vertical line on the stage. In the Properties Inspector set the X to 0, the Y to -65, and the height to 65. Play with the thickness and color if you like.
8. Insert -> New Symbol, "hourHand". Use the line tool to draw a vertical line on the stage. In the Properties Inspector set the X to 0, the Y to -45, and the height to 45. Play with the thickness and color.
9. In the library, you need to set the linkage for your three new movieclips. Double click next to "hourHand" and type in "hourHand", double click next to "minuteHand" and type in "minuteHand", double click next to "secondHand" and type in "secondHand".
10. Open up the Actions window again. Add the following code:
var localDate:Date = new Date();
var seconds:Number = localDate.getSeconds();
var minutes:Number = localDate.getMinutes();
var hours:Number = localDate.getHours();
var mySecondHand:secondHand = new secondHand();
addChild(mySecondHand);
var randomSeconds:Number = (8 + Math.floor(Math.random()*12));
var myMinuteHand:minuteHand = new minuteHand();
addChild(myMinuteHand);
var randomMinutes:Number = (8 + Math.floor(Math.random()*12));
var myHourHand:hourHand = new hourHand();
addChild(myHourHand);
var randomHours:Number = (8 + Math.floor(Math.random()*12));
addEventListener(Event.ENTER_FRAME,updateTime);
function updateTime(event:Event)
{
localDate = new Date();
seconds = localDate.getSeconds();
minutes = localDate.getMinutes();
hours = localDate.getHours();
mySecondHand.rotation = seconds * 6;
myMinuteHand.rotation = minutes * 6;
myHourHand.rotation = hours * 30 + minutes / 2;
trace(seconds);
}
11. Inside the "assembleClock" function, paste in this code:
mySecondHand.x += (mouseX - mySecondHand.x) / randomSeconds;
mySecondHand.y += (mouseY - mySecondHand.y) / randomSeconds;
myMinuteHand.x += (mouseX - myMinuteHand.x) / randomMinutes;
myMinuteHand.y += (mouseY - myMinuteHand.y) / randomMinutes;
myHourHand.x += (mouseX - myHourHand.x) / randomHours;
myHourHand.y += (mouseY - myHourHand.y) / randomHours;
The "updateTime" function finds the time every time the movie enters a new frame. It then angles the hands according to the time. The second hand moves 6 degrees for every second (because 6*60 = 360), the minute hand moves 6 degrees for every minute, and the hour hand moves 30 degrees for every hour plus half a degree for each minute. I could have combined it with the "assembleClock", but I think this makes it a little more clear.
Unless you want to resize your clock, you're done! Test your movie. It should have working hands that show the correct time and follow the mouse just like the numbers do.
If you do want to resize your clock then...
12. Each number is 65 pixels from the center of the clock, but since most of the numbers are at an angle to the center of the clock I had to find their x and y distances by using trigonometry. At the top of your code, you can see I have set three variables, a, b, and c. These are the three sides of a right triangle. Set "c" equal to the radius of your clock. In my case, c= 65. Now go to http://www.calculator.com/calcs/calc_sci.html and plug in these formulas to find a and b.
sin(30) * c = a ("c" is what you wanted the radius of your clock to be, remember?)
cos(30) * c = b
Test your clock, make sure you're happy with the size. Now you're really done!
Tuesday, June 21, 2011
Friday, June 3, 2011
How to Make a Simple Analogue Clock in AS3
Difficulty: Easy (but it is math heavy)
Skills Used: rotation, getting the date/time, nested movieclips, eventhandlers
This is about as basic as Actionscript gets. We're building a clock, then using Actionscript to animate it. Since this clock is contained in a movieclip, you can resize it and move it around, which is handy if you want to include it in a picture of a room or something.
Instructions:
1. Open a new file in Flash. Make sure you are using Actionscript 3.0. Right click on the grey area around the stage and select "Document Properties" from the menu that pops up. I made my stage 300 x 300 pixels, you set yours to whatever size you need.
2. In the top menu, select Insert -> New Symbol. Name this symbol "clockface". We will now begin adding numbers to the clock's face. If you want to freehand this, you can start typing the numbers on the stage using the Text tool and eyeball how you position them. If you'd rather be precise, then follow my instructions to create a bunch of movieclips, they're easier to center.
3. Select Insert -> New Symbol again and name it "12". Select the Text tool from the Tool menu, it looks like the letter T. In the Properties Inspector, set the first two options to "Classic Text" and "Static Text". Then pick the font and font size that you want. Mine is "Herculanum", 35 pt. Click on the stage. Type the number "12". In the Tools window, select the Selection tool, it looks like a black arrow. Click on the "12" you typed. Use the Alignment window to center the 12 right over that little cross in the middle of your screen.
4. Select Insert -> New Symbol and name your symbol "1". Use the Text tool to make a 1. Use the Alignment menu to center it horizontally and vertically. Do the same thing for 2-11.
5. In the library, double click on the "clockface" movieclip. Drag the "12" movieclip to the stage. In the Properties Inspector, set the X location to "0" and the Y location to negative however far you want your numbers from the center. In my case, Y is -100.
6. Drag the "6" movieclip to the stage. In the Properties Inspector, set X to 0 and Y to positive however far you want the numbers from the center, in my case 100. Are you happy with the size of your clock so far? If not, this is a good time to change it. Drag the "3" mc to the stage. Set the Y to 0 and the X to positive the distance from the center. (100) Drag the "9" mc to the stage. Set the Y to 0 and the X to negative the distance you want. (-100) Still happy with the size of your clock?
7. Positioning the rest of the numbers will take a little more math. Just a little. You're going to be using two numbers over and over, and here's how you calculate them. Go to http://www.calculator.com/calcs/calc_sci.html and calculate these two numbers...
first number: sin(30) * yourDistance (we'll call this "a")
second number: cos(30) * yourDistance (we'll call this "b")
Go ahead and write them down.
So for my clock...
sin(30) * 100 = 50 (a)
cos(30) * 100 = 86.6 (b)
1: X = a, Y = -b
2: X = b, Y = -a
4. X = b, Y = a
5. X = a, Y = b
7. X = -a, Y = b
8. X = -b, Y = a
10. X = -b, Y = -a
11. X = -a, Y = -b
Use this formula to position your numbers around the face of the clock. Or, you know, you could just eyeball it.
8. Using the Oval tool, draw a circle around your clock face. Hold down the shift key as you drag out your oval to make it a perfect circle. I used a gradient for my stroke just to make it look a little more interesting. Use the Align window to center it.
9. In the top menu, select Insert -> New Symbol, name it "secondHand". Use the line tool to draw a vertical line on the stage. Use the Properties Inspector to make its height the same as the distance the numbers are from the center (in my case 100). Set the X to 0 and the Y to negative your distance (mine is -100). Play with the thickness and color if you like.
10. Insert -> New Symbol, name it "minuteHand". Draw a line. X = 0, Y = -your distance, height = your distance. I used a gradient to make mine more interesting.
11. Insert -> New Symbol, name it "hourHand". Draw a line. I made mine 60 pixels long, you do what you think looks good. Set the X to 0, the Y to negative whatever you picked. (In my case -60.) I used a gradient to make mine look more interesting.
12. Select Insert -> New Symbol. Name this one clock. Create five layers in the timeline and name them "Actions, "hour", "minute", "second" and "face", from top to bottom. Drag the "clockface" movieclip from the library to the stage in the "face" layer, use the Align window to center it. Drag the hourhand into the "hour" layer, center it. Drag the minutehand into "minute", center it. Drag the secondhand into "second", center it.
13. Select the "Actions" layer. Open up the Actions window and paste in the following code:
var localDate:Date = new Date();
var seconds:Number = localDate.getSeconds();
var minutes:Number = localDate.getMinutes();
var hours:Number = localDate.getHours();
addEventListener(Event.ENTER_FRAME,updateTime);
function updateTime(event:Event)
{
localDate = new Date();
seconds = localDate.getSeconds();
minutes = localDate.getMinutes();
hours = localDate.getHours();
secondHand.rotation = seconds * 6;
minuteHand.rotation = minutes * 6;
hourHand.rotation = hours * 30 + minutes / 2;
trace(seconds);
}
To find the time using Actionscript, first you need to set a variable that is equal to the date. Then you use the getHours function to find the hour, the getMinutes section to find the minutes, etc. We need the time to update continuously, so an eventlistener is used to reset the time with every frame. The time determines the angle of each hand. There are 360 degrees in a circle, so the second hand needs to move six degrees every second (60 seconds * 6 degrees = 360 degrees), the minute hand needs to move six degrees every minute, and the hour hand needs to move 30 degrees for each hour, plus a little more depending on the minute. You need to include the minutes divided by two because otherwise the hourhand would point straight to the six all through the six hour, and then jump straight from six to seven at 7:00.
14. Go back to the mainframe of your movie. Drag the "clock" movieclip to the stage. You can center it, place it within a picture, resize it, whatever you want.
Test your movie, you should have a working clock.
Thursday, June 2, 2011
How to Make a Lite-Brite in AS3
Difficulty: Easy
Concepts Used: for loops, switch case, goToAndPlay, currentTarget, addChild, event handlers
For this project we use a forloop to create all of the lightbulbs, and each one can be controlled individually using the same event handler. Each circle is a movieclip. When clicked, that movieclip advances to another frame, where another color is displayed.
Instructions:
1. Open up a new document in Flash, make sure you're using Actionscript 3.0. Right click on the grey area around the stage and select "Document Properties". Set the dimensions to 560 x 440 (if you want to make a bigger Lite-Brite, you can change this later) and the background color to black.
2. Download the image files at the bottom of this tutorial. (Download them, don't just copy and paste or you'll get white backgrounds.) There are nine images total, including a white one (second from the bottom) that you can't see on this white background. Import the image files to your library.
3. From the top menu, select Insert -> New Symbol. Name the symbol "lite". Create three layers in the timeline and name them "Labels, "Actions", and "Colors". Select frame 45 in all three layers, right click and select "Insert Frame" from the menu that pops up. Select frame 5 in all three layers, right click, and select "Insert Keyframe" from the popup menu. Create keyframes in all three layers for frames 10, 15, 20, and so on until frame 40.
4. (This step is optional, but it's a good idea to get into the habit of using frame labels.) Select frame 1 in the "Labels" layer. In the properties inspector, find where it says "Name" under "Labels" and type in "black". You should now see the word "black" in the "Labels" layer of the timeline. Using the same process, label the following frames:
5: blue
10: green
15: orange
20: pink
25: purple
30: red
35: white
40: yellow
5. Select frame 5 in the "Colors" layer. Drag "blue.png" from the library to the stage. Use the align menu to center the image both horizontally and vertically. That little cross should be right in the center of the image. Select frame 10, drag "green.png" to the stage, center it, and so on until you have placed all of the colors in their respective frames.
6. Go back to the mainframe of the movie by clicking "Scene 1" in the top left corner. Change the name of "Layer 1" to "Actions". Open the Actions window and paste in the following code:
/*The number of rows and columns we will have*/
var rows:Number = 16;
var columns:Number = 42;
/*Store the image width and height (40x40)*/
var imageWidth:Number = 10;
var imageHeight:Number = 10;
/*Padding between the images*/
var padding:Number = 1.3;
/*Left edge space*/
var left:Number = 8;
/*place the holes on the stage*/
for (var i = 0; i < rows; i++)
{
/*setting the even rows*/
for (var j = 0; j < columns; j++)
{
var newLiteOdd:lite = new lite();
/* Setting the X and Y position*/
newLiteOdd.x = left + j * imageWidth * padding;
newLiteOdd.y = 20 + i * 2 * imageHeight * padding;
this.addChild(newLiteOdd);
// add an eventlistener so the lite changes color when clicked
newLiteOdd.addEventListener(MouseEvent.CLICK, changeColor);
}
for (var k = 0; k < columns; k++)
{
/*setting the odd rows*/
var newLiteEven:lite = new lite();
/* Setting the X and Y position*/
newLiteEven.x = left + 7 + k * imageWidth * padding;
newLiteEven.y = 33 + i * 2 * imageHeight * padding;
this.addChild(newLiteEven);
/* add an eventlistener so the lite changes color when clicked*/
newLiteEven.addEventListener(MouseEvent.CLICK, changeColor);
}
}
/*when a lightbulb is clicked this function is called*/
function changeColor(event:MouseEvent):void
{
/*a switch case can be a more efficient alternative to using several if/else statements*/
switch (event.currentTarget.currentFrame)
{
case 1:
event.currentTarget.gotoAndPlay(5);
break;
case 5:
event.currentTarget.gotoAndPlay(10);
break;
case 10:
event.currentTarget.gotoAndPlay(15);
break;
case 15:
event.currentTarget.gotoAndPlay(20);
break;
case 20:
event.currentTarget.gotoAndPlay(25);
break;
case 25:
event.currentTarget.gotoAndPlay(30);
break;
case 30:
event.currentTarget.gotoAndPlay(35);
break;
case 35:
event.currentTarget.gotoAndPlay(40);
break;
case 40:
event.currentTarget.gotoAndPlay(1);
break;
default:
event.currentTarget.gotoAndPlay(1);
}
}
This code does a few things. First, it creates variables that will control how many rows and columns will be created, how much spacing there will be on the left side of the stage, how large the images are, and how much space there should be between the images. This way it will be easy to go back and change these values later, if necessary, without combing through all of the code.
Two forloops are used to create the odd and even rows. I did it this way because the even rows needed to be placed farther to the right, and this was easier than coming up with a fancy equation to determine if it was an even or odd row.
Then, an eventlistener calls the function "changeColor" whenever a lite is clicked. Each lite is a movie clip that is stopped at frame 1. When clicked, the movieclip advances to frames 5, 10, and so on until it returns back to the 1. I could also have used the frame labels and said "gotoAndPlay("blue"), but this way was easier. When you click a lite, only the lite you clicked will change color, the others will stay the same. This is because we use event.currentTarget to only affect the lite whose evenlistener was triggered. (Note: Somewhere along the way, I got in the habit of using "event:MouseEvent" to define a function. A lot of people use "e:MouseEvent" or even "evt:MouseEvent". These will all work, but whatever you use, use consistently. If I used "e" to define the function, but then referred to "event.currentTarget" in the switch case, I would have received an error that said "access of undefined property event".)
You're done! Test your movie by hitting Ctrl + Enter. Make sure the holes are lined up properly and each lite changes color when you click it. If you want to make a bigger Lite-Brite, change the size of your document and then increase the number of rows and columns as needed.
Download the Image Files:


Friday, May 27, 2011
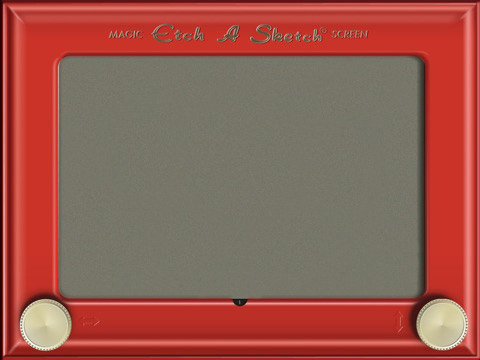
How to Make an Etch a Sketch in AS3
Difficulty: Easy
Skills Used: addChild, removeChild, depth, sound effects, arrays, for loops, event listeners, registration points, particles, key events
Make a working Etch a Sketch. Draw anything your little heart desires using your arrow keys, then erase it by hitting "Erase!"
Instructions:
1. Make a new file in Flash. Make sure it's Actionscript 3.0. Right click on the grey area next to the stage and select "Document Properties". Set the stage to 480 x 360 pixels.
2. In the timeline, create five layers and name them (from top to bottom) "Actions", "Erase", "Knobs", "Frame", and "BG". Download the picture of the Etch a Sketch from the bottom of this tutorial, import it to your library, and place it in the "BG" layer. Center it so it covers the entire stage.
3. We want the Etch a Sketch "drawing" to appear to be under the red frame, not on top of it. Download the frame from the bottom of this tutorial (download it, don't just copy and paste or you'll have a white background) and import it to your library. Drag it into the "Frame" layer and center it so it is directly above the background picture.
4. Even though we're not really using the knobs on this Etch a Sketch, it's still fun to make them turn. Download the picture of the knob (download it, if you copy and paste you'll get a white background) and import it into your library. Drag the knob into your "Knob" layer and place it directly over the left knob on the Etch a Sketch frame. (X: 45, Y: 324.5) Right click the knob and select "Convert to Symbol". It doesn't matter what you name the movieclip, just call it "knob". But in the properties inspector, give the instance of the knob the name "leftKnob". I rotated my left knob 90 degrees clockwise to make it look a little different from the right knob.
5. Drag a second instance of your knob movieclip into the "Knobs" layer and place it directly over the right knob on the Etch a Sketch frame. (X: 442.5, Y: 325) In the properties inspector, name this second instance "rightKnob".
6. In the top menu, select Insert -> New Symbol. Name the symbol "particle".Use the Oval Tool to make a circle that is .75 x .75, with no stroke, and fill it with 555555. Use the align menu to center it over the registration point. (The registration point is that little cross in the center of the screen.) Go to the library. Find the particle movie clip. Double click to the right of "particle", under the "Linkage" column, and type in "particle". So now it should say "particle" under "Name" and under "Linkage".
7. Go back to the mainframe of the movie by clicking "Scene 1" in the upper left corner. Select the "Actions" layer in the timeline. Open the Actions window and paste in the following code...
import flash.display.Sprite;
import flash.events.KeyboardEvent;/*Important! Otherwise when you post your swf to the web the keys won't register.*/
var Xloc:uint = 63;/*where the particles will be drawn on the stage*/
var Yloc:uint = 61;/*where the particles will be drawn on the stage*/
var particleArray:Array = new Array();/*an array to keep the particles organized*/
stage.addEventListener(KeyboardEvent.KEY_DOWN, sketch);/*when the user presses a key, call the sketch function*/
function sketch(event:KeyboardEvent):void
{
switch (event.keyCode)
{
case 37:
//left
if (Xloc > 58)
{
Xloc -= 1;//adjust the left/right position
leftKnob.rotation -= 5;/*rotate the knob*/
}
break;
case 39:
//right
if (Xloc < 425)
{
Xloc += 1;
leftKnob.rotation += 5;
}
break;
case 38:
//up
if (Yloc > 56)
{
Yloc -= 1;
rightKnob.rotation -= 5;
}
break;
case 40:
//down
if (Yloc < 299)
{
Yloc += 1;
rightKnob.rotation += 5;
}
break;
default:
trace (event.keyCode)/*this is a good way to look up the keycode for a key you don't know*/
}
/*draw a particle on the screen*/
var particleMC = new particle();
particleMC.x = Xloc;
particleMC.y = Yloc;
addChildAt(particleMC,1);/*we're drawing the particles at depth 1, which is above the background but below everything else*/
particleArray.push(particleMC);/*adds drawn particles to an array, will make it easy to erase them later*/
}
This creates an event listener that waits for the user to press a key. Every time the user presses an arrow key, it moves the location where a particle will be drawn either left, right, up, or down. Then it draws the particle, and adds it to an array to keep things organized. Notice that I'm using "addChildAt" instead of "addChild". This draws the particles at depth 1, just above the background layer, so it won't appear on top of the frame.
Test your movie. You should be able to draw on your Etch a Sketch using the arrow keys, and the knobs should turn.
8. The app is almost finished, but there's no way to erase your drawing. We need to fix that. Download the Erase button from the bottom of the tutorial. (Download it, don't just copy and paste.) Import it to your library, drag it to the "Erase" layer, and use the properties inspector to move it to X: 177, Y: 301. Right click the button and select "Convert to Symbol". Name the movieclip "erase", or whatever you want, doesn't really matter. Then in the properties inspector name this instance of the movieclip "erase".
9. (Optional) Find or record a sound effect for "shaking" the Etch a Sketch. I recorded myself gently shaking some rice in a plastic bag using Audacity. Import it to your library. Double click next to your mp3 file, under "Linkage" and name it "shake".
10. Select the "Actions" layer and open the actions window again. Add the following code to the bottom of the window:
erase.addEventListener(MouseEvent.CLICK, eraseParticles);/*when you click the erase button, it calls the eraseParticles function*/
var shakeEffect:Sound = new Sound();
shakeEffect = new shake();
var shakeChannel:SoundChannel = new SoundChannel();/*get the shake sound ready*/
function eraseParticles(event:MouseEvent):void
{
shakeChannel = shakeEffect.play();/*play shake sound effect*/
for (var i:uint=particleArray.length-1; i>0; i--)/*kind of backwards, but this way I can use the pop method*/
{
removeChild(particleArray[i]);/*removes particle from stage*/
particleArray.pop();/*removes last item from array*/
}
}
This puts an event listener on the erase button so when the user clicks it, it calls the eraseParticles function. The function plays the sound effect and uses a backwards forloop to erase each particle one by one and delete it from the array. If you're not using a sound effect, erase or comment out the four lines that contain the word "shake".
You're done! Test your movie and make sure it's drawing and erasing properly.
Final Code:
import flash.display.Sprite;
import flash.events.KeyboardEvent;/*Important! Otherwise when you post your swf to the web the keys won't register.*/
var Xloc:uint = 63;/*where the particles will be drawn on the stage*/
var Yloc:uint = 61;/*where the particles will be drawn on the stage*/
var particleArray:Array = new Array();/*an array to keep the particles organized*/
stage.addEventListener(KeyboardEvent.KEY_DOWN, sketch);/*when the user presses a key, call the sketch function*/
function sketch(event:KeyboardEvent):void
{
switch (event.keyCode)
{
case 37:
//left
if (Xloc > 58)
{
Xloc -= 1;//adjust the left/right position
leftKnob.rotation -= 5;/*rotate the knob*/
}
break;
case 39:
//right
if (Xloc < 425)
{
Xloc += 1;
leftKnob.rotation += 5;
}
break;
case 38:
//up
if (Yloc > 56)
{
Yloc -= 1;
rightKnob.rotation -= 5;
}
break;
case 40:
//down
if (Yloc < 299)
{
Yloc += 1;
rightKnob.rotation += 5;
}
break;
default:
trace (event.keyCode)/*this is a good way to look up the keycode for a key you don't know*/
}
/*draw a particle on the screen*/
var particleMC = new particle();
particleMC.x = Xloc;
particleMC.y = Yloc;
addChildAt(particleMC,1);/*we're drawing the particles at depth 1, which is above the background but below everything else*/
particleArray.push(particleMC);/*adds drawn particles to an array, will make it easy to erase them later*/
}
erase.addEventListener(MouseEvent.CLICK, eraseParticles);/*when you click the erase button, it calls the eraseParticles function*/
var shakeEffect:Sound = new Sound();
shakeEffect = new shake();
var shakeChannel:SoundChannel = new SoundChannel();/*get the shake sound ready*/
function eraseParticles(event:MouseEvent):void
{
shakeChannel = shakeEffect.play();/*play shake sound effect*/
for (var i:uint=particleArray.length-1; i>0; i--)/*kind of backwards, but this way I can use the pop method*/
{
removeChild(particleArray[i]);/*removes particle from stage*/
particleArray.pop();/*removes last item from array*/
}
}
Download the Image Files:


Thursday, May 26, 2011
How to Make an Arrow Point at the Mouse in AS3
Difficulty: Easy
Skills Used: trigonometry, mouse location, dynamic textboxes
A simple movie clip where the rotation of the arrow is based on the mouse's location. Good introduction to using trigonometry in Actionscript 3.0.
Instructions:
1. Open up a new file in Flash. Make sure you are using Actionscript 3.0. I made my stage 300x300 pixels.
2. In the top menu, select Insert -> New Symbol. Name the symbol "arrow". Draw an arrow pointing straight up. Then drag the arrow so that it's registration point (that's the little cross that always stays in place no matter where you put the arrow) is at bottom center of your arrow. The registration point determines how the arrow will rotate, so this is important.
3. In the upperleft corner where it says "Scene 1 arrow" click on "Scene 1". This brings you back to the mainframe of the movie. Drag the arrow symbol from the library to the stage, center it and keep it close to the top of the stage. Rename the current layer in the timeline "arrow".
4. Create a new layer in the timeline and name it "Actions". Open up the actions window and paste the following code:
addEventListener(Event.ENTER_FRAME, rotate);
function rotate(e:Event)
{
var x:int = mouseX - myArrow.x;
var y:int = mouseY - myArrow.y;
var angle:int = Math.atan(y/x)/(Math.PI/180); //finds the arc tan of x/y, then converts it to degrees
if (x<0)
{
angle += 180;
}
myArrow.rotation = angle + 90;
}
This creates an event which will update the arrow's location every time the movie enters a new frame. It calculates the arctan of y/x, then converts that number from radians to degrees. Arctan is always positive, which means if we didn't modify the angle it would always point to the right. The if statement determines if the arrow should be pointing to the right. Finally, we add 90 degrees to the angle calculated because otherwise the arrow would be at an angle to the mouse.
Test your movie, the arrow should be pointing to the mouse at all times.
5. (Optional) If you want to see the degree of the angle of your arrow, which could help you modify the code later on, then you can add a dynamic text box that shows the current angle. Create a new layer in the timeline called "text". Use the text tool to draw a text field box on the stage. Center the textfield.
In the properties inspector, name the instance of this textbox "myAngle". Make sure it is set to "classic text", not "TLF" text. Make sure it is "dynamic", not "static" or "input". In the "Character" menu, click the button that says "Embed.." and a menu will pop up. In the "Character ranges" list, select "Numerals 0-9", then hit OK. (It's important to always embed your text, otherwise the text could disappear at inconvenient times.) Back in the properties inspector, under the "Paragraph" menu, set the format to centered.
Select the "Actions" layer and open up the Actions window again. Inside of the "rotate" function, add one last line of code:
myAngle.text = String(myArrow.rotation);
You're done! Test your movie and make sure the textbox is displaying the angle correctly.
Final Code:
addEventListener(Event.ENTER_FRAME, rotate);
function rotate(e:Event)
{
var x:int = mouseX - myArrow.x;
var y:int = mouseY - myArrow.y;
var angle:int = Math.atan(y/x)/(Math.PI/180); //finds the arc tan of x/y, then converts it to degrees
if (x<0)
{
angle += 180;
}
myArrow.rotation = angle + 90;
myAngle.text = String(myArrow.rotation);
}
How to Make a Scrolling Menu in AS3
Difficulty: Medium
Skills Used: tweens, buttons, links
Instructions:
1. Get your posters (or whatever you'd like to display) together. Open them up in Photoshop and make thumbnails of each one. In my menu the vertical posters are about 200 px tall, and the horizontal posters are about 150 px tall.
2. As long as you're in Photoshop, let's go ahead and make the buttons that you will need. If you'd rather, you can download mine at the bottom of this tutorial. (Note: These are pngs, so download them, don't just copy and paste them, or you will get backgrounds.) Create a new layer, delete the background layer (so you can see the grey and white grid), then make your button. I made mine a circle with an arrow-shaped hole cut out of it, and I added shading and drop shadows. The circle is about 100 x 100. Save your button as a png. Remember, you can just make one and then flip it horizontally.
Don't know how to use Photoshop? There's an ebook that can teach you in just a few hours. Check it out here.
3. Open up a new Flash document. Make sure you're using Actionscript 3.0. My stage is 600 x 300, and I made the background color 333333. You'll have to decide what's best for your website and your posters. Import your arrows and poster thumbnails into the library.
4. From the menu at the top, select Insert -> New Symbol. Name your new symbol "posters", or something you'll remember. In the timeline, create a layer, name it "posterThumbnails". Drag the symbol posters into the layer posters, then use the align menu to center it. (I know, it's just a little circle, just center that circle.)
5. Double click on the little circle that represents your posters movieclip so that at the top of the stage, where it said "Scene 1", now it should say "Scene 1 posterThumbnails". Create a layer in the timeline and name it "thumbnails". Start dragging your thumbnails to the stage. Make sure they all have the same Y value in the properties inspector and look evenly spaced. When you run out of room, select all the posters and slide them over. You can quickly select all of the posters at once by clicking on the "thumbnails" layer you created. The length of your thumbnails should be significantly wider than the stage, otherwise what would be the point of scrolling? When you're done, position the thumbnails so that the leftmost poster is close to the left edge of the stage.
6. Go through the thumbnails (know, it's very tedious) and convert each one to a movieclip by right clicking the thumbnail and choosing "Convert to Symbol". Then name the instance on the stage a name that will be easy to remember.
7. Create another layer and name it "Actions". Open up the Actions Window and for each poster thumbnail, you will need to add the following code:
posterName.addEventListener(MouseEvent.CLICK, clickPosterName);
function clickPosterName(evt:MouseEvent):void
{
navigateToURL(new URLRequest("http://yourPostersURL.com"), "_same");
}
The "poster name" is the name you gave to the instance of the thumbnail in step 6. The URL should be a website that displays the poster or whatever is related to it.
Test your movie. Make sure the proper website opens up when you click on each thumbnail.
Test your movie. Make sure the proper website opens up when you click on each thumbnail.
8. Go back to the main frame by clicking on "Scene 1" above the stage. Create a layer on the timeline (above the thumbnails layer) called "buttons". Place the left and right buttons in this layer. In the properties inspector, name the instance of the left button "leftButton" and the instance of the right button "rightButton".
9. Select the thumbnails layer. You need to decide how far the thumbnails should move to the right and left before they automatically stop. Drag it to the left as far as you want it to go. Look at the properties inspector and write down the X position. Now drag the thumbnails layer to the right as far as you want it to go. Look at the properties inspector again and write down the X position again. Then put the thumbnails layer back where you want it to be when the menu first opens up.
9. Select the thumbnails layer. You need to decide how far the thumbnails should move to the right and left before they automatically stop. Drag it to the left as far as you want it to go. Look at the properties inspector and write down the X position. Now drag the thumbnails layer to the right as far as you want it to go. Look at the properties inspector again and write down the X position again. Then put the thumbnails layer back where you want it to be when the menu first opens up.
10. Create another layer in the timeline. Name this one "Actions". (Yes, you made an actions layer before, but that was within the thumbnails movieclip, remember?) Open up the actions window and paste in the following code...
import fl.transitions.*;
import fl.transitions.easing.*;
var leftTween:Tween;
var rightTween:Tween;
rightButton.addEventListener(MouseEvent.CLICK, goRight);
leftButton.addEventListener(MouseEvent.CLICK, goLeft);
function goRight(evt:MouseEvent):void
{
if (thumbnails.x > -700)
{
leftTween = new Tween(thumbnails,"x",Strong.easeOut, thumbnails.x, (thumbnails.x - 200),2,true);
}
}
function goLeft(evt:MouseEvent):void
{
if (thumbnails.x < 2350)
{
rightTween = new Tween(thumbnails,"x",Strong.easeOut, thumbnails.x,(thumbnails.x + 200),2,true);
}
}
Both of the functions begin with an if statement. Change the "-700" and the "2350" to the x values you wrote down in step 9. The smaller number should go in the "goRight" function, the larger number should go in the "goLeft" function.
10. Test your movie. Do the buttons work? Are you happy with how far the thumbnails scroll? Do the thumbnails automatically stop when you go too far to the right or left? If your thumbnails aren't scrolling, make sure that you named the instances properly. The thumbnails should be called "thumbnails", the left button should be called "leftButton" and the right button should be called "rightButton".
11. Make another layer in the timeline, below the "buttons" layer. Call it "fadeout". This is where you will place your gradient rectangles, so your posters fade away instead of just falling off the stage. Download my gradient from the bottom of this tutorial if you need an example. Open it up in Photoshop. Mine is 100 pixels wide, about 1/6 of of the width of the stage, and 300 pixels tall, the same height as the stage. If you need to make your own, just open up a new file that's the size you need. Create a new layer. Delete the background layer. In layer 1, use the gradient tool to make a gradient that starts out the same color as the background of your movie and ends up transparent. Save it as a png. Then flip it horizontally and save it again.
12. Go back to Flash. Import your two gradients to the library, then drag them to the "fadeout" layer. Place the left one so it is centered vertically and hangs just to the left of the left side of the stage. Place the right one so it is centered vertically and ends just to the right of the right edge of the stage. Test your movie one more time and make sure you can't see a gap on the edges of your movie.
You're done!
Download the Image Files:


Subscribe to:
Posts (Atom)