Difficulty: Easy
Skills Used: follow the mouse, follow the mouse with delay, event listeners, rotation, registration points
Instructions:
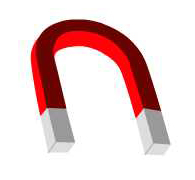
1. Create a picture of a magnet and a paperclip. I made mine directly in Flash. If you'd like, you can download my magnet and paperclip at the bottom of this tutorial.
To Create the Pictures in Flash
Click on "Insert" in the menu at the top of the page, and select "New Symbol" from the dropdown menu. Give the symbol a name you will remember. Draw your magnet using the tools.
To Create the Pictures in Photoshop
Download my images from the bottom of this tutorial and open them in photoshop. Use the wand tool to select the background, then hit delete. If the background is transparent, you should be able to see that white and gray grid. Delete the background layer if necessary. Save the file as a png. Import the png to your library. You will need to convert the png to a movie clip by right-clicking on the png and selecting "Convert to Symbol" from the dropdown menu.
Don't know how to use Photoshop? You can learn it in just two hours! Click here to get the tutorial.
2. Create three layers and name them "Actions", "Paperclip", and "Magnet" respectively. Drag the paperclip into the "Paperclip" layer, convert to a symbol if necessary. In the properties inspector, name this instance "paperclip". Drag the magnet into the "Magnet" layer, convert to a symbol if necessary. In the properties inspector, name this instance "magnet".
3. In the library, double-click the paperclip. See that little cross that always stays in the same place no matter where you move the paperclip? That's the registration point. It serves as the rotation point of the paperclip, and also determines where it will be positioned in respect to the mouse. Drag the paperclip so that the registration point is at the top center.
In the library, double-click the magnet. Set the registration point. I set it to the left leg of the magnet. This will determine where the paperclip will "stick" to the magnet.
4. Select the "Actions" layer in the timeline and open the Actions window. Add the following code:
addEventListener(Event.ENTER_FRAME, moveStuff);
function moveStuff(e:Event)
{
/*paper clip follows the mouse with delay*/
paperclip.x += (mouseX - paperclip.x)/6;
paperclip.y += (mouseY - paperclip.y)/6;
/*move the magnet*/
magnet.x = mouseX;
magnet.y = mouseY;
}
The event listener tells the function "moveStuff" to run every time the movie enters a new frame. The function tells the magnet to follow the mouse and the paperclip to follow the mouse with a delay. To make the magnet "stronger", change the "6" to a smaller number. To make the magnet "weaker", change the "6" to a larger number.
Run your movie. Make sure the magnet is following the mouse and the paperclip is trailing behind the mouse.
5. The paperclip is gliding across the stage without rotating at all. We will add code to control the rotation of the paperclip so that it is always "pointing" at the mouse. In the Actions window, add the following code inside of the "moveStuff" function.
/*control the angle of the paperclip*/
var myAngle = Math.atan( (paperclip.x - magnet.x) / (paperclip.y - magnet.y) )
paperclip.rotation = myAngle/(Math.PI/180);
"myAngle" uses the arctan function to determine the angle of the paperclip based on the difference between the mouse's location and the paperclip's location. The rotation of the paperclip is them set to myAngle/(Math.PI/180) because "myAngle" is in radians and we need to convert it to degrees.
Test your movie again. The paperclip should skitter in a more realistic way now.
6. We're almost done, but the mouse is still visible. Well add more code to hide it. At the top of the Actions window, add the following code: (If you don't, the movie might look like it's working, but post it to the web and the mouse will be visible again.)
import flash.ui.Mouse;
Mouse.hide();
Then, at the bottom of the Actions window, add these two functions:
stage.addEventListener(Event.MOUSE_LEAVE, showMouse);
function showMouse(evt:Event):void
{
Mouse.show();
}
stage.addEventListener(MouseEvent.MOUSE_MOVE, hideMouse);
function hideMouse(evt:Event):void
{
Mouse.hide();
}
The first function shows the mouse every time it leaves the stage. The second function hides the mouse every time it moves within the stage.
7. (Optional) I tried to make it look like the magnet and the paperclip are on opposite sides of a glass panel. If you'd like, create a nearly transparent glass layer in photoshop (with no background!), save it as a png, then import it to the library and drag it onto the stage in a layer between the magnet and paperclip.
You're done! Think of something else you can make that follows the mouse with a delay.
Final Code:
import flash.ui.Mouse;
Mouse.hide();/*You must include this or the mouse will be visible when you post your movie to the web!*/
addEventListener(Event.ENTER_FRAME, moveStuff);
function moveStuff(e:Event)
{
/*paper clip follows the mouse with delay*/
paperclip.x += (mouseX - paperclip.x)/6;
paperclip.y += (mouseY - paperclip.y)/6;
/*move the magnet*/
magnet.x = mouseX;
magnet.y = mouseY;
/*control the angle of the paperclip*/
var myAngle = Math.atan( (paperclip.x - magnet.x) / (paperclip.y - magnet.y) )
paperclip.rotation = myAngle/(Math.PI/180);
}
/*if the mouse leaves the map, show the mouse*/
stage.addEventListener(Event.MOUSE_LEAVE, showMouse);
function showMouse(evt:Event):void
{
Mouse.show();
}
/*if the mouse moves anywhere on the stage, show the mouse*/
stage.addEventListener(MouseEvent.MOUSE_MOVE, hideMouse);
function hideMouse(evt:Event):void
{
Mouse.hide();
}
Download the Image Files:


No comments:
Post a Comment